

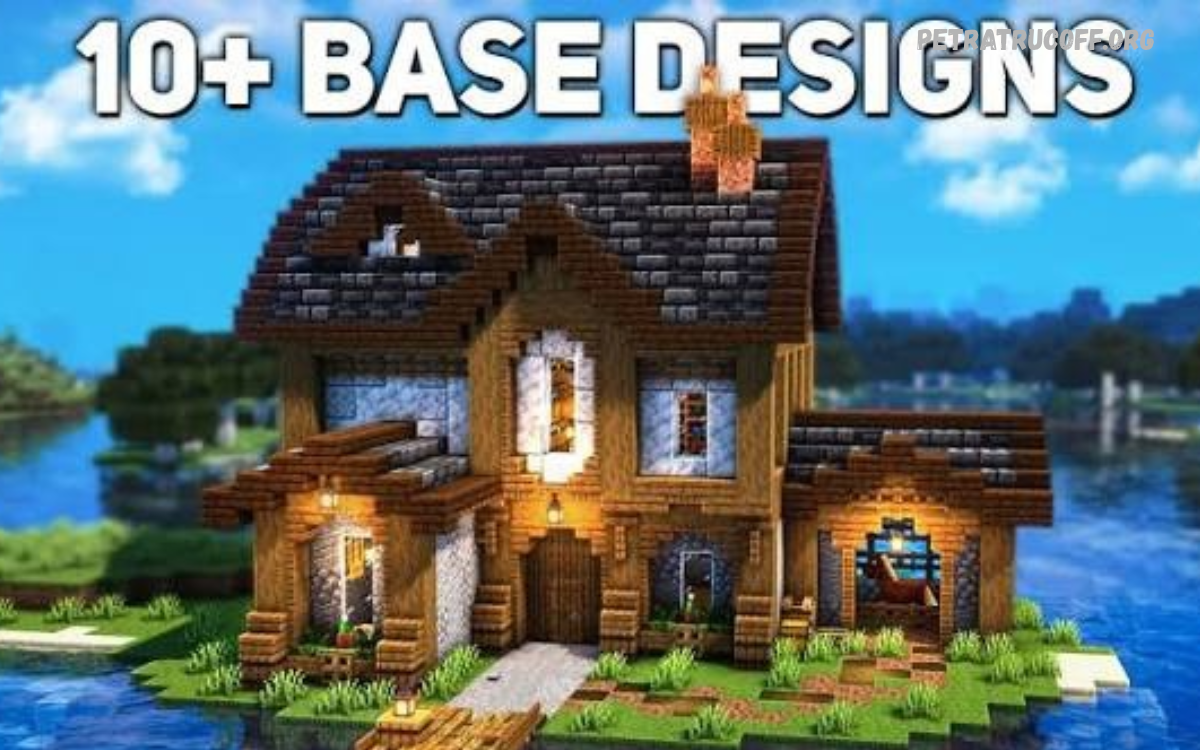
Minecraft Survival Base Design helps players create secure, practical, and attractive homes inside Minecraft. A well-planned base protects valuable resources, organizes equipment, supports farming, and provides a comfortable place to prepare for adventures.
Choosing the right design depends on available resources, terrain, building experience, and personal preferences. A successful survival base combines safety, functionality, and creativity without wasting valuable materials.
What Is Minecraft Survival Base Design?
Minecraft Survival Base Design refers to planning and constructing a functional home that supports survival gameplay. A base provides shelter, storage, crafting stations, sleeping areas, and protection from hostile mobs.
An effective design balances appearance with everyday usefulness. Compact bases suit beginners who have limited resources, while larger structures support advanced projects and long-term worlds.
Best Minecraft Survival Base Design Ideas
Underground Survival Base
An underground survival base offers excellent protection and efficient use of space. Players can build beneath hills, forests, or plains using stone, deepslate, bricks, and decorative blocks. Separate rooms provide space for crafting, storage, sleeping, smelting, and enchanting without exposing valuable resources to the surrounding environment.
Lighting and entrances deserve special attention when building underground. Torches, lanterns, and other light sources help illuminate corridors, while sturdy doors or concealed entrances improve security. Glass ceilings can introduce natural light into selected rooms, and underground farms can support food production when properly illuminated and supplied with water.
Mountain Base Design
Mountain bases combine impressive views with natural defensive advantages. Players can carve rooms into cliffs, construct balconies overlooking valleys, or build bridges connecting separate sections. Stone bricks, spruce wood, glass panes, and lanterns create an attractive appearance that blends with mountainous landscapes.
A practical mountain base should include accessible entrances, stairways, and transportation routes. Water elevators or carefully designed staircases can connect different floors, while balconies provide outdoor farming and observation areas. Players should also plan enough space for storage and crafting before expanding deeper into the mountain.
Modern Survival House
A modern survival house features clean shapes, large windows, open rooms, and carefully selected materials. White concrete, quartz, glass, stone, and dark wood can create a contemporary appearance. Flat roofs, balconies, outdoor seating areas, and compact gardens add visual interest without making the structure unnecessarily complicated.
Modern houses can remain highly practical when their interiors receive equal attention. A central crafting room, organized storage wall, bedroom, and kitchen-style decoration provide useful everyday spaces. Players can also build a basement for enchanting, brewing, and smelting, keeping the main living area uncluttered.
Medieval Castle Base
A medieval castle provides a large, defensive home with towers, courtyards, walls, and protected entrances. Stone bricks, cobblestone, spruce logs, iron bars, and decorative banners create a traditional fortress appearance. Players can place storage rooms and workshops inside the walls while reserving central spaces for farms or animal enclosures.
Castle construction requires more materials than smaller base designs, so collecting resources before beginning is helpful. Building one section at a time makes the project easier to manage. Start with the main hall and outer walls, then add towers, bridges, guard rooms, and decorative details as resources become available.
Starter Survival Base
A starter base is ideal for the first days of a new Minecraft world. A simple wooden house, small stone shelter, or compact hillside room can provide enough space for a bed, crafting table, furnace, and storage chests. These essentials allow players to survive their first nights and prepare for resource collection.
The best starter design prioritizes speed, safety, and future expansion. Use common materials instead of spending early resources on expensive decorations. Leave room for additional storage, a small crop farm, and a secure entrance so the temporary shelter can eventually become part of a larger survival base.
Essential Features Every Survival Base Needs
Secure Entrance and Lighting
A secure entrance protects the base from hostile mobs and helps prevent accidental encounters during nighttime exploration. Solid doors, fences, gates, and well-lit pathways create a safer approach to the main building. Players can also add a small entrance hall that separates outdoor areas from storage and living spaces.
Lighting is equally important throughout the base. Torches, lanterns, and other suitable light sources help prevent hostile mob spawning in many areas, although exact requirements depend on the block, mob, and game version. Illuminate corridors, staircases, farms, rooftops, and surrounding paths to reduce dark spots that may create unwanted encounters.
Organized Storage Room
An organized storage room saves time by keeping important resources easy to find. Separate chests for building blocks, ores, food, tools, weapons, farming materials, and mob drops make inventory management much simpler. Item frames and signs can identify categories, while barrels provide an alternative storage option for compact spaces.
Larger bases benefit from storage rooms located near crafting and smelting areas. This arrangement reduces unnecessary travel when building, repairing equipment, or preparing for exploration. Advanced players can add hopper-based sorting systems, but a simple labeled chest arrangement is usually sufficient during the early stages of survival.
Crafting and Smelting Area
A dedicated crafting area keeps essential workstations together and creates a more efficient building routine. Place crafting tables, furnaces, blast furnaces, smokers, stonecutters, and anvils where appropriate. Keeping frequently used equipment close to storage allows players to gather materials and begin crafting without searching through the entire base.
Smelting areas should include enough space for fuel and raw materials. Multiple furnaces can process different resources simultaneously, while blast furnaces and smokers handle suitable materials more quickly. Decorative walls, chimneys, and workbenches can make the room visually appealing without interfering with its practical purpose.
Bedroom and Respawn Point
A bedroom provides a comfortable personal space and allows players to set their respawn point using a bed. Place the bed in a protected room away from exposed entrances and dangerous areas. Nearby chests, armor stands, and decorative furniture can make the bedroom feel complete while keeping essential equipment accessible.
Players should remember that beds have specific survival mechanics. Sleeping can skip nighttime under suitable conditions, but beds do not function normally in the Nether or the End and can explode when used there. Keep the primary sleeping area inside a secure Overworld base and consider maintaining backup equipment for unexpected situations.
Best Materials for Minecraft Survival Base Design
Wood and Stone Combinations
Wood and stone create a balanced appearance suitable for almost every survival base. Oak, spruce, birch, and dark oak offer different colors and textures, while cobblestone, stone bricks, and andesite provide strong visual contrast. Combining these materials prevents large walls from appearing flat or repetitive.
Material selection should reflect the surrounding biome and available resources. Spruce wood complements snowy mountains and taiga forests, while sandstone works naturally in desert environments. Stone foundations, wooden beams, and carefully placed glass windows create attractive structures without requiring rare blocks or extensive resource collection.
Glass and Decorative Blocks
Glass introduces natural light and makes small rooms feel more spacious. Large windows suit modern houses, while narrow openings complement medieval buildings and underground bases. Glass panes are useful for smaller windows, whereas full glass blocks can create broad viewing areas overlooking mountains, oceans, and forests.
Decorative blocks add personality without changing the main layout. Lanterns, carpets, flower pots, trapdoors, stairs, slabs, and banners can improve the appearance of walls and entrances. Use these details selectively so the structure remains visually balanced and important pathways stay clear.
How to Plan a Survival Base Layout
Choose the Right Location
Location affects safety, convenience, resource access, and future expansion. Plains offer open building space, forests provide nearby wood, mountains offer dramatic terrain, and coastal areas provide access to water transportation. Choose a location that matches your preferred building style and offers convenient access to essential resources.
Before constructing the base, inspect the surrounding terrain for caves, cliffs, rivers, and nearby villages. Check whether the area has enough room for farms, animal pens, and additional buildings. A carefully chosen location can reduce construction work and make everyday survival tasks much easier.
Divide the Base Into Functional Zones
Functional zones help keep the base organized as it grows. Create separate areas for living, crafting, storage, farming, animal care, and enchanting. Smaller bases can combine several functions within one building, while larger projects can use separate rooms or connected structures for each activity.
Plan movement between these areas before adding decorative details. Storage should remain close to crafting stations, farms should have convenient access to water, and animal pens should be easy to reach. Shorter travel routes improve efficiency and leave more time for mining, exploration, and construction.
Leave Space for Future Expansion
A survival base often grows beyond its original purpose. Players may eventually need brewing rooms, villager trading halls, automatic farms, Nether portals, or larger storage systems. Reserving open land or designing additional floors helps accommodate these features without requiring a complete rebuild.
Vertical construction can save space in crowded locations. Underground rooms, upper floors, rooftops, and nearby outbuildings can support different activities while maintaining a compact central area. Build the essential structure first, then expand gradually as your collection of materials and gameplay needs increase.
Farming Ideas for a Survival Base
Crop Farm Design
A crop farm provides a reliable food supply and supports long-term survival. Wheat, carrots, potatoes, and beetroot can grow in suitable farmland with access to water and sufficient light. Arrange crop rows around water channels to make harvesting easier and create a neat agricultural area beside the main house.
Small farms work well during the early game, while larger farms support breeding and food production. Fences can protect crops from unwanted animal movement, and nearby chests provide convenient storage for harvested items. Players should also replant suitable crops after harvesting to maintain a steady supply.
Animal Farm Design
Animal farms provide food, breeding opportunities, and useful materials. Separate pens for cows, sheep, chickens, and pigs help maintain an organized farming area. Wooden fences, gates, hay bales, and small shelters can create a practical farm that matches the surrounding base design.
Place animal pens far enough from bedrooms and crafting rooms to prevent the area from feeling crowded. Keep breeding supplies in nearby chests and leave walking space around each enclosure. A compact barn can combine several animal areas while protecting them from the surrounding environment.
Automatic Farm Integration
Automatic farms can reduce repetitive work and improve resource collection. Depending on the farm design, players can use water streams, hoppers, redstone components, observers, and dispensers to automate harvesting or item collection. Suitable projects include sugar cane farms, bamboo farms, and selected crop or mob-drop systems.
Automation requires careful planning because farm mechanics can vary between Java Edition and Bedrock Edition. Some systems also depend on simulation distance, player proximity, or specific game mechanics. Test each design before building it on a large scale, and keep maintenance access available for troubleshooting.
Advanced Minecraft Survival Base Design Features
Enchanting Room
An enchanting room provides a dedicated location for improving tools, weapons, and armor. Place an enchanting table in a well-organized room with bookshelves positioned according to the game’s enchanting requirements. Shelves, dark wood, candles, and decorative blocks can create a magical appearance without overcrowding the available space.
Keep lapis lazuli and frequently used equipment in nearby storage. An adjacent anvil area can support additional equipment management, while a small chest provides space for enchanted books. Locating the enchanting room near the main storage area makes preparation for mining and exploration more convenient.
Brewing Room
A brewing room supports potion preparation and can become an important feature in advanced survival worlds. Brewing stands, ingredient chests, water bottles, and storage shelves should remain easy to access. Nether wart, blaze powder, and other ingredients can be organized into labeled containers to simplify potion crafting.
Choose a location that allows room for future equipment and additional storage. Decorative glass bottles, stone bricks, copper blocks, and lanterns can create a laboratory-style appearance. Keep valuable brewing materials organized so players can prepare suitable potions before exploring dangerous structures or challenging areas.
Nether Portal Room
A Nether portal room provides a dedicated gateway to another dimension. Build the portal in a secure, accessible location with enough clearance around the frame. Stone-based blocks and other suitable nonflammable materials can create a protective enclosure that fits naturally into the base’s architecture.
Players should also prepare the surrounding area for safe entry and exit. Keep essential equipment nearby, illuminate the entrance, and avoid placing valuable storage directly beside the portal. A clearly marked route from the main living area makes dimension travel easier and helps players return without confusion.
Read Also: Minecraft Shaders Guide: Best Shaders, Installation, and Performance Tips
Secret Rooms and Hidden Storage
Secret rooms offer creative ways to store valuable items or add mystery to a survival base. Players can conceal entrances behind paintings, decorative walls, trapdoors, or redstone-powered mechanisms. Hidden rooms work particularly well inside mountains, beneath houses, and behind storage walls.
Design hidden areas around accessibility rather than appearance alone. Ensure the entrance remains usable, provide adequate lighting, and leave enough space for chests or important equipment. In multiplayer worlds, remember that concealed entrances are not guaranteed security, so valuable resources should also be protected through sensible storage practices.
Defensive Features for a Safer Base
Walls, Fences, and Defensive Perimeters
A defensive perimeter helps separate the base from nearby hostile mobs and creates a clear boundary around important structures. Stone walls, fences, gates, and raised walkways can protect farms and entrances while supporting different architectural styles. The perimeter should be large enough to allow future buildings and practical movement.
Inspect corners, entrances, and uneven terrain for gaps that may allow mobs to enter. Use suitable lighting throughout the enclosed area and keep gates closed when necessary. Defensive walls work best when combined with good lighting, secure doors, and careful awareness of nearby caves and dark spaces.
Iron Golems and Other Defenses
Iron golems can help defend villages and certain base areas against hostile mobs. Players may encounter naturally generated golems in villages or create them using the required blocks. A nearby village can therefore provide opportunities for trading, exploration, and learning more about protective structures.
Other defensive features include secure entrances, well-lit paths, and protected animal enclosures. Avoid relying on a single defense because different mobs have different movement and spawning mechanics. A combination of terrain awareness, lighting, solid construction, and sensible planning generally provides more dependable protection.
Common Minecraft Survival Base Design Mistakes
Building Without a Plan
Starting a large structure without a basic plan can lead to awkward rooms, crowded entrances, and wasted materials. Players sometimes build impressive outer walls before considering storage, crafting stations, or transportation routes. These problems can make an attractive base frustrating to use during everyday gameplay.
Sketch a simple layout before collecting large quantities of resources. Decide where essential rooms, farms, entrances, and expansion areas will fit. Even a basic plan can reduce rebuilding, improve movement between rooms, and help the finished structure feel more organized.
Ignoring Lighting and Accessibility
Dark corridors, poorly placed ladders, and narrow entrances can make a base inconvenient or unsafe. Players may overlook rooftops, basements, farms, and side paths while illuminating the main building. These neglected areas can become troublesome when hostile mobs spawn or players need to move quickly.
Inspect every level after construction and add suitable lighting where necessary. Make staircases wide enough for comfortable movement, keep doors accessible, and avoid unnecessary obstacles near workstations. Good accessibility improves everyday gameplay and makes the entire base easier to maintain.
Overusing Expensive Materials
Using rare blocks throughout an early-game base can delay essential survival progress. Players may spend too much time collecting decorative resources instead of securing food, upgrading equipment, or exploring nearby caves. Large projects become more manageable when construction materials match the player’s current resources.
Use common blocks for foundations and hidden structural sections, then reserve expensive materials for focal points. Quartz, copper, glass, and other decorative options can improve selected rooms without requiring an entire building to use them. Expand the design gradually as resource collection becomes easier.
Minecraft Survival Base Design for Beginners
Beginners should start with a compact base that includes a bed, crafting table, furnace, and several storage chests. A simple rectangular structure made from wood and stone provides enough room for essential survival activities. Add torches around the entrance and create a small crop farm nearby to support food production.
Once the basic shelter is complete, expand one feature at a time. Build animal pens, improve storage organization, add an enchanting area, and create safer pathways around the property. This gradual approach helps new players learn building techniques while maintaining a reliable place to rest and organize resources.
Minecraft Survival Base Design for Experienced Players
Experienced players can develop complex bases featuring multiple buildings, redstone systems, underground networks, and large agricultural areas. A central storage hub can connect to workshops, farms, villager trading halls, and transportation systems. Consistent materials and architectural details help separate functional zones while maintaining a unified appearance.
Advanced projects benefit from testing and staged construction. Complete the central structure first, then build supporting systems and decorative areas around it. Consider performance and loading behavior when using many entities or complicated redstone machines, especially in large worlds or multiplayer environments.
How to Make a Survival Base Look Beautiful
Visual variety can transform a simple survival shelter into a memorable building. Combine full blocks with stairs, slabs, walls, fences, and trapdoors to create depth and texture. Roof overhangs, window frames, support beams, and layered foundations make structures appear more detailed without requiring rare materials.
Landscaping also plays an important role in the final appearance. Add pathways, gardens, trees, ponds, bridges, and outdoor seating areas around the building. Keep the landscape connected to the base’s architectural style, and use lighting to highlight entrances, gardens, and walking routes after sunset.
Frequently Asked Questions
What Is the Best Minecraft Survival Base Design?
The best design depends on your resources, experience, and preferred building style. A compact starter house works well for beginners, while underground bases and mountain homes offer excellent opportunities for space-efficient construction and creative layouts.
Where Should I Build a Survival Base in Minecraft?
Plains, forests, mountains, and coastal areas are popular choices. Select a location with convenient access to wood, stone, water, and food, while considering terrain, available building space, and nearby resources.
What Should Every Minecraft Survival Base Include?
Every practical base should include a bed, crafting table, furnace, organized storage, adequate lighting, and a secure entrance. Farms, enchanting rooms, animal pens, and additional workshops can be added as your survival world develops.
How Can I Protect My Minecraft Survival Base?
Use solid walls, secure entrances, appropriate lighting, and protected farm areas. Inspect surrounding caves and dark spaces, close gates when necessary, and avoid leaving valuable resources in exposed locations.
How Do I Build a Survival Base With Limited Resources?
Start with common materials such as wood, cobblestone, and dirt for temporary construction. Focus on essential rooms and basic storage before collecting expensive decorative blocks or beginning large building projects.
Are Underground Bases Better Than Surface Bases?
Underground bases can provide efficient space usage and natural concealment, while surface bases offer easier expansion, natural lighting, and convenient outdoor farming. Both options work well when designed around your survival needs.
Can I Build an Automatic Farm Inside My Survival Base?
Yes, suitable automatic farms can be integrated into a base. Choose a design compatible with your Minecraft edition, leave enough room for maintenance, and test the farm’s mechanics before expanding it.
How Can I Expand My Survival Base Later?
Reserve space for additional rooms, farms, workshops, and transportation systems. You can expand horizontally with connected buildings or vertically using upper floors and underground rooms, depending on the available terrain.
Conclusion
Minecraft Survival Base Design combines creativity, resource management, safety, and practical planning to create a home that supports every stage of the game.
Begin with essential rooms, organize storage, create reliable food sources, and add suitable defensive features. As your world develops, expand gradually with enchanting rooms, automatic farms, secret areas, and transportation systems.

1 comentario
Pingback: Minecraft Texture Pack Installation: Complete Guide - PetraTrucoff