

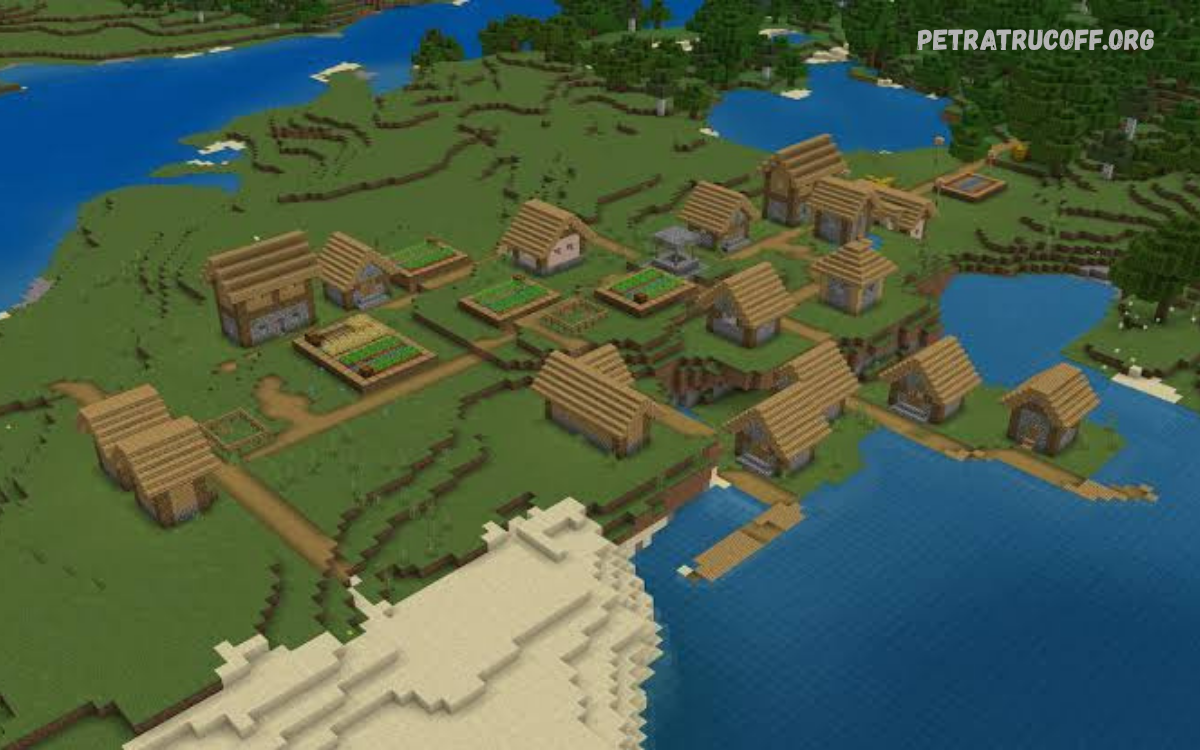
A Minecraft Village Guide helps players discover villages, understand villager professions, collect valuable resources, and build safer settlements. Villages matter in Minecraft because they offer houses, farms, villagers, and useful items that support survival and exploration.
Whether you are a beginner or an experienced player, learning how villages work can make your Minecraft adventure more rewarding.
What Is a Village in Minecraft?
A village is a naturally generated settlement containing buildings, villagers, pathways, and other structures. Villages can appear in several biomes, including plains, deserts, savannas, taigas, and snowy regions, depending on the Minecraft edition and world generation rules.
Villages provide opportunities for trading, farming, exploration, and resource collection. Players can also use them as temporary shelters or develop them into larger settlements.
How to Find a Village in Minecraft
The easiest way to find a village is to explore open areas and look for buildings, farms, pathways, and villagers. Plains and desert biomes can be convenient places to search because their relatively open terrain makes distant structures easier to spot while traveling.
You can improve your search by exploring elevated locations and following natural routes through suitable biomes. If cheats are enabled, supported versions may allow you to use the /locate structure village command to find a nearby village.
Best Biomes for Finding Minecraft Villages
Minecraft villages generate in several suitable biomes, including plains, deserts, savannas, taigas, and snowy plains. Each biome creates a different village appearance, with building materials and designs that reflect the surrounding environment.
Plains villages often feature grassy surroundings, while desert villages use sandstone-based designs. Savanna villages commonly contain acacia wood, and taiga villages use materials suited to forested environments. Exploring different biomes helps players discover varied village styles and resources.
Types of Villages in Minecraft
Minecraft villages have different architectural styles based on their biome. Common village types include plains, desert, savanna, taiga, and snowy villages, each featuring distinctive buildings, pathways, and decorative elements that match the local environment.
These variations make villages interesting locations for exploration and building inspiration. Players can study the structures, collect suitable materials, and use similar designs when constructing their own settlements.
Minecraft Village Buildings and Structures
Village buildings serve different purposes, including housing villagers, storing resources, providing workstations, and supporting farming activities. Common structures include houses, farms, meeting areas, and buildings associated with specific villager professions.
Players should explore each building carefully to discover useful resources and understand the village layout. Some structures may contain chests with valuable items, while others provide workstations that villagers use to perform their professions.
Minecraft Villager Jobs and Professions
Villagers can take on different professions when they have access to suitable job-site blocks and meet the relevant conditions. Common professions include farmer, librarian, toolsmith, weaponsmith, armorer, cleric, cartographer, fisherman, and fletcher, each offering different trades and services.
Profession selection is influenced by available workstations, villager circumstances, and game mechanics. Nitwits cannot take professions, and villagers who have already traded may have locked professions. Understanding these rules helps players organize a village and make useful trades more efficiently.
Best Villager Trades in Minecraft
Villager trading allows players to exchange emeralds and other items for useful resources. Depending on their profession and available offers, villagers may provide food, enchanted books, tools, armor, maps, building materials, and other items that can support survival gameplay.
Librarians can be especially useful when seeking enchanted books, while farmers often provide accessible food-related trades. The value of a trade depends on the offer, available resources, and current game mechanics. Comparing different villagers helps you identify trades that suit your needs.
How to Trade with Villagers in Minecraft
To trade with a villager, approach them and interact with them using the appropriate control for your platform. The trading interface displays available offers, required items, and the resources you can receive in exchange.
Collect the required materials before trading and keep useful items organized in your inventory. Villagers may restock certain trades when they can access their workstations and meet the relevant conditions. Trading regularly can help you obtain emeralds, equipment, and other resources without relying entirely on exploration or mining.
How to Breed Villagers in Minecraft
Villager breeding allows players to increase a village’s population when the necessary conditions are met. In general, you need eligible adult villagers, sufficient food, and enough valid beds for the growing population. The exact mechanics and requirements can vary between Java Edition and Bedrock Edition.
Farmers can help by collecting and sharing food under suitable conditions, although food can also be provided by players. Ensure that villagers can reach the required areas and that the environment is safe. A carefully arranged breeding area makes it easier to manage population growth and expand your settlement.
How to Build Your Own Village in Minecraft
You can create a village-style settlement by constructing houses, placing beds, adding pathways, and providing suitable workstations for villagers. Begin with a small, organized layout and include enough room for villagers to move safely between buildings and important locations.
Choose building materials that match your preferred biome and architectural style. Wood, stone, bricks, glass, and decorative blocks can help create attractive homes and useful structures. Add lighting, farms, storage areas, and defensive boundaries to make your settlement practical as well as visually appealing.
How to Expand and Improve a Minecraft Village
Expanding an existing village involves adding houses, improving pathways, building farms, and creating safe spaces for villagers. Plan new structures around the village’s existing layout so residents can move between beds, workstations, and other important locations without unnecessary obstacles.
You can also improve the appearance of a village with gardens, lanterns, bridges, fountains, and decorative walls. Functional upgrades, such as additional farms and organized storage, make the settlement easier to manage. Combining attractive designs with practical features creates a more useful and enjoyable village.
How to Protect Villagers from Zombies
Villagers can be threatened by hostile mobs, particularly zombies and other enemies that appear under suitable conditions. Lighting important areas, securing entrances, and reducing dark spaces can help limit hostile mob activity around your settlement.
Build fences or walls around vulnerable areas and ensure villagers can reach safe buildings at night. Iron golems can also help defend villagers against certain hostile mobs. Regularly inspect the village perimeter and repair damaged sections to maintain a safer environment during survival gameplay.
How to Defend a Village During a Raid
A raid can begin when a player with the Bad Omen effect enters a village under the applicable game rules. Raids involve waves of hostile illagers, making preparation important if you want to protect villagers and buildings.
Before engaging in a raid, prepare suitable weapons, armor, food, and defensive equipment. Secure villagers inside protected buildings where possible and understand the surrounding terrain to avoid becoming overwhelmed. Raid mechanics and the way Bad Omen is obtained can differ across Minecraft versions, so check the rules for your edition.
Minecraft Village Farms and Food Sources
Village farms commonly grow crops such as wheat, carrots, potatoes, and beetroot, depending on the generated village and game conditions. These farms provide food that players can collect and help support villager activities, including certain breeding mechanics.
You can improve farming areas by expanding crop plots, organizing water sources, and replanting harvested crops. Protect crops from trampling and keep the surrounding area secure. A reliable food supply supports survival gameplay and reduces the need to travel long distances to collect basic resources.
How to Find Chests and Loot in Minecraft Villages
Some village buildings contain chests with items useful in the early stages of survival. Depending on the structure and game version, loot may include food, seeds, tools, materials, emeralds, or other resources.
Explore houses and other structures carefully, checking accessible interiors for storage containers. Loot varies between villages, so do not expect every building to contain a chest or every chest to provide the same items. Collect useful resources and organize them before you continue exploring.
Read Also: How to Earn Robux Without Breaking the Rules
Best Resources to Collect from Minecraft Villages
Villages can provide valuable early-game resources, including crops, food, beds, building materials, and access to villager trades. Depending on the settlement, you may also find hay bales, useful workstations, and chests containing additional items.
Collect resources responsibly if you plan to keep the village intact. Replant harvested crops, avoid unnecessarily damaging buildings, and preserve useful workstations. Keeping the settlement functional allows you to continue trading with villagers and benefit from its resources throughout your survival adventure.
How to Find an Abandoned Village in Minecraft
An abandoned village, sometimes called a zombie village, is a less common village variation featuring damaged or neglected-looking buildings. These settlements may contain cobwebs, mossy blocks, and other visual details that distinguish them from ordinary villages.
Abandoned villages can be interesting exploration locations, but they may not provide the same immediate trading opportunities as a populated settlement. If you want to establish a functioning village, you will need to understand villager availability and the requirements for creating or restoring a suitable settlement.
How to Make a Village More Beautiful
Improving a village’s appearance can make exploration and building more enjoyable. Use consistent materials, decorative pathways, gardens, flower beds, lanterns, and coordinated building designs to create a settlement with a clear visual theme.
You can also add a central meeting area, a market, bridges, fountains, and custom houses inspired by the surrounding biome. Keep decorations practical by preserving accessible pathways and adequate lighting. A well-designed village combines visual appeal with convenient access to farms, homes, and workstations.
Best Minecraft Village Tips for Beginners
Beginners should prioritize finding a village, collecting basic food, and securing a safe place to spend the night. Villages can provide useful early-game resources, but players should remain alert to hostile mobs and avoid assuming that every settlement is completely safe.
Once you have established a base, learn the basics of villager trading, farming, and workstation placement. Keep useful items in storage, light dark areas, and protect important villagers. These simple habits can make village exploration more productive while helping you build a strong foundation for long-term survival.
Common Minecraft Village Problems and Solutions
Players may encounter problems such as villagers refusing to take professions, beds becoming unavailable, villagers failing to breed, or hostile mobs entering a settlement. These issues can result from blocked paths, unavailable workstations, insufficient beds, unsuitable conditions, or game-specific mechanics.
Start by checking whether villagers can reach their beds and workstations and whether the area meets the relevant requirements. Remove obstacles, improve lighting, and review profession or breeding rules for your Minecraft edition. Making one change at a time can help you identify the cause without rebuilding the entire village.
Minecraft Village Guide for Java and Bedrock Editions
Minecraft Java Edition and Bedrock Edition share many village features, including villagers, trading, farms, and biome-based village designs. However, certain mechanics, mob behavior, villager interactions, and technical details may differ between the two editions.
When following a tutorial, confirm that it applies to your edition and game version. A villager breeder, raid strategy, or trading setup designed for Java Edition may not work identically in Bedrock Edition. Checking compatibility before building saves resources and prevents unnecessary troubleshooting.
Frequently Asked Questions
How Do You Find a Village Quickly in Minecraft?
Explore biomes like plains, deserts, savannas, taigas, and snowy plains. If commands are enabled, use the supported village location command for your game edition to identify a nearby village.
Which Villages Are Available in Minecraft?
Common village styles include plains, desert, savanna, taiga, and snowy villages. Their buildings and materials vary by biome and world-generation rules.
How Do You Get Emeralds from Villagers?
You can get emeralds by trading with villagers who offer them. Farmers, fletchers, and other professions may provide suitable offers depending on their available trades.
How Do You Protect a Minecraft Village?
Improve lighting, secure entrances, build protective walls or fences, and provide safe buildings for villagers. Iron golems can also help defend the settlement against certain hostile mobs.
Can You Build Your Own Village in Minecraft?
Yes. You can create a village-style settlement by building houses, placing beds, adding suitable workstations, and providing a safe environment for villagers. Organizing pathways and food sources can make the settlement more functional.
How Do You Breed Villagers in Minecraft?
Give eligible adult villagers enough food and enough valid beds under the applicable game rules. Keep the area safe and accessible, and check edition-specific requirements if breeding doesn’t occur.
What Is the Best Villager Profession in Minecraft?
No single profession is best for every player. Librarians can provide enchanted books, farmers offer useful food-related trades, and toolsmiths, weaponsmiths, and armorers can help players obtain equipment.
Are Minecraft Villages Different in Java and Bedrock?
Yes. Both editions feature villages and villager trading, but some mechanics and technical details differ. Always check that a tutorial matches your edition and current game version.
Conclusion
This Minecraft Village Guide explains how to find villages, understand villager professions, trade for useful resources, build settlements, and protect villagers from hostile mobs.
Start by exploring suitable biomes, gathering resources, and securing a safe settlement. As you gain experience, improve village buildings, organize farms, and develop efficient trading areas.

1 comentario
Pingback: Minecraft House-Building Ideas: Best Designs for Every Player - PetraTrucoff